Rest test is an in-house custom tool written in C#, used primarily for continually running integration tests against REST API endpoints. Although its primary use is continuous testing of API endpoints, the tool also supports:
- SOAP communication
- performance testing mode
- smoke testing mode
- reporting results into either:
- standalone HTML report
- Azure Log Analytics Workspace with Azure Workbook used to visualize those results
Tests
Tests are written using fluent interface. Following is an example of a single test case.
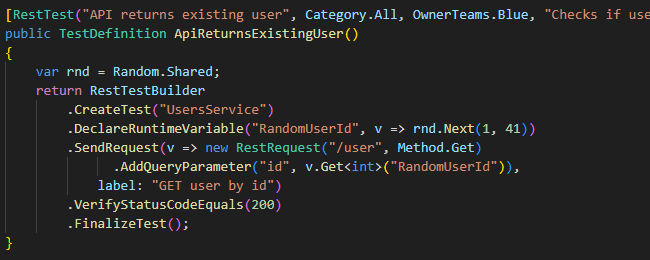
The example above does the following in this order:
- targets service called "UsersService" in configuration
- picks random number and stores it as variable called "RandomUserId"
- sends HTTP request, references variable "RandomUserId"
- verifies that the HTTP request returned status code 200
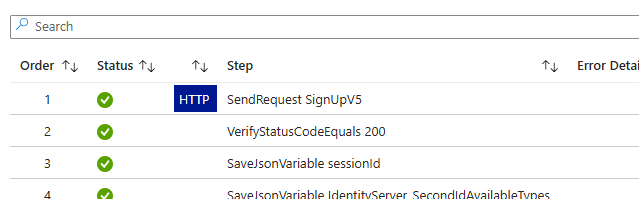
When reporting results, Rest test reports result of each test step, including their detail (e.g. HTTP request and response). This simplifies investigations especially when tests are executed remotely.
Rest test supports setup and teardown via hooks - test cases with specific name: TestSuitePreHook, TestSuitePostHook, TestCasePreHook and TestCasePostHook
Components
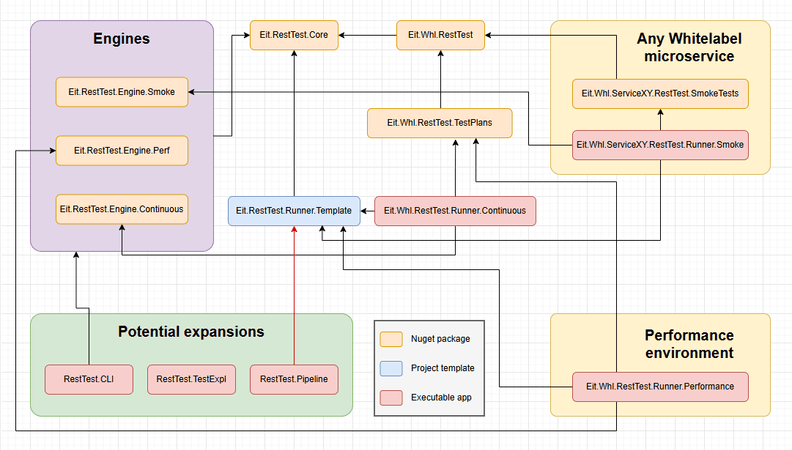
The entire tool consists of:
- framework for writing tests
- package containing core functionality
- engine packages to determine execution mode
- extension methods for simplified configuration in applications
The tool is made to be extensible, allowing users to create their own custom steps or group steps together into single step; add custom settings and services, etc.
Creating and running tests
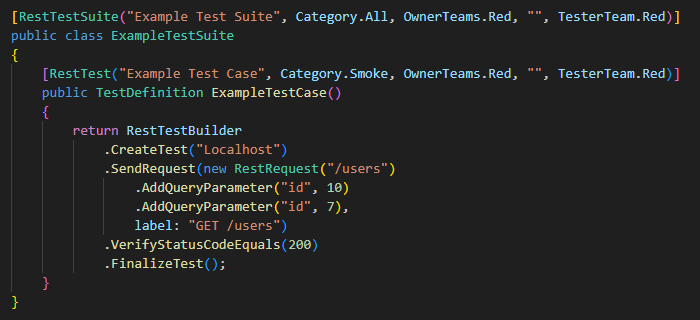
How to create test case
Every test case must be part of a test suite. In rest test, test suite is just a public class annotated by RestTestSuite attribute. All test suites must be inside a test library (a c# library project). The entire project must be compiled into a DLL. Finally, rest test loads the DLL via C# Reflection and runs tests found inside.
Step by step guide:
- Create a new project of type 'Class Library'. Make sure that project type is for C#.
- Add following NuGet package to the project:
Hci.RestTest.Core - Add new class - that class will represent the test suite.
- In the class add reference to the following namespaces:
using Hci.RestTest.Core.Framework; using Hci.RestTest.Core.Framework.Builders; using Hci.RestTest.Core.Framework.Definitions; - Make sure that the class is
public - Add
RestTestSuiteattribute above the class. This marks the class for the engine to load. - Add a
publicmethod that returnsTestDefinitionobject. - Add
RestTestattribute above the method. - To build a test, call
RestTestBuilder.CreateTest("name_of_target_host")after which you can chain additional steps. - Finalize the test by calling
FinalizeTestmethod as last step of the test case. - Return the resulting object (TestDefinition) from your test case method.
How to create an application that can run rest tests
Rest test is using dependency injection to instantiate services registered at application's startup and inject them into the engine and, if needed, into test suites. By default, rest test reads configuration from JSON files. For those reasons, it is easier to use a Web API-type of project rather than standard console application project. However it is possible to set up rest-test in either project type.
Step by step guide:
- Create a new project. This should be some executable application. For example
ASP.NET Core Web APIproject. - Add reference to one of the engine NuGet packages. This example will use
Hci.RestTest.Engine.Continuous. - In
Program.csclass you can register various services as such: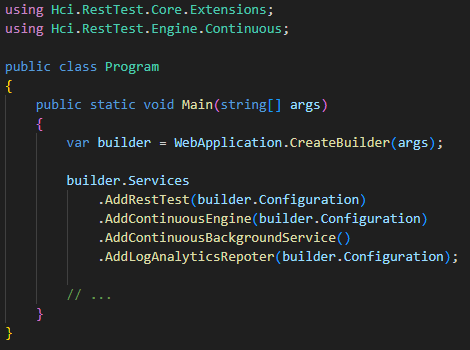
This configuration adds rest-test; the engine for continually running tests; running the engine as a background worker; and reporting results to log analytics workspace. - Remaining setting comes from configuration JSON files.